It’s been almost exactly a year since I first got a 3D printer, and a couple things have conspired recently to convince me to take it off the shelf and try using it again. The most pressing need is for more parts boxes for organizing SMD parts: I use coin envelopes for storing cut strips of SMD components, and then use some custom-sized 3D printed boxes for storing them:

I’m starting to run low on these, plus I wanted to have a slightly different design: the boxes are great, but the organizational unit of “a box” is slightly too large for some purposes, and I wanted to add some ribs so that there can be some subdivision inside each box. These part boxes are pretty much the only useful thing I’ve ever done with my 3D printer, so I was excited to have an excuse to try using it again!
Installing Printrbot upgrades
My printer is an “old” Printrbot Simple — one of the first versions. 3D printers as a business is an interesting one: things are moving very quickly, so as a company, what do you do for your users that bought old versions? My guess is that most companies revel in the opportunity to sell you a brand new printer, but Printrbot has an interesting strategy: they will sell you upgrades that let you mostly retrofit your old printer to have new features of a new one. It’s not as easy as simply buying one of their new models, but if you want to follow along with their latest trends it’s cheaper to get the upgrades instead of a new model every time.
I bought some of their upgrades: a “build volume upgrade” and a “tower” upgrade. There were some issues installing them since apparently my printrbot is too old and the upgrade, even though designed to work with it, has its documentation written for a newer model. Anyway, I got them installed without too much trouble, and in the process installed the endstops and fan from the original kit (which were themselves upgrades).
And this is what I got:


So as I should have expected, there were a large number of issues.
Problem #1: slantedness
All the prints were coming out slanted on the x axis. It’s hard to know exactly why, since there are a couple things that changed: there’s a new printbed (what gets moved by the X axis), and I had re-fishing-line the X axis as well. I dealt with this problem for a long time in the past — I spent several full days dealing with it when I first got the printer. The thing that ended up working originally was I replaced the provided polyfilament fishing line with monofilament fishing line, and it magically started working. Well, I’m using monofilament line, though it’s not the same as on the Y-axis — I think I’m using stronger, but therefore thicker, line, and I wonder if that’s an issue. I tightened things up again and the prints are coming out better but still slanted (maybe 10 degrees instead of 30).
Problem #2: cable management
I had originally tried hooking up the fan from the original fan upgrade I got, and this required running another pair of wires through the cable harness. I also had to undo the cable ties I had set up to keep the cabling neat, in order to install the “tower” upgrade. The result of these two things was that the cable harness started running into the print! You can see that in the second picture in the back starting about 40% of the way into the print; the effects end about 60% of the way since I taped the wires out of the way as a proof-of-concept fix. I ended up sending the stepper motor wires over the stepper motor instead of under it as they suggest, and it started working magically.
Problem #3: print consistency
This one I don’t really understand, but there are a couple symptoms: first is that the prints are visibly not very “full” — you can see in the pictures that you can see the blue painter’s tape through gaps in the bottom two layers. The second symptom is that sometimes I will hear some noises coming from the extruder; on investigating, I saw that it doesn’t pull any filament in during those events, and also that there is some white dust (ground filament line) accumulating in extruder chamber, and clogging up the hobbled bolt. My first theory is that this could potentially be due to the filament: I haven’t used the filament in about a year, and haven’t done anything special to store it. There are reports on the internet that PLA will take on water over time, resulting in various issues; I didn’t see anyone say that chipping the filament was one of them, but who knows it’s possible. (Side-note: if something gets shipped in a bag with a desiccant, it’s probably best to store it in the bag with the desiccant. Live and learn.)
So I switched to some different filament I had, and had some similar issues. It probably wasn’t the best test since I got this filament from the same place (both came from printrbot.com), but it ended up not being too big a deal since I tried something else to fix the issue: I increased the temperature.
Unfortunately I lost pretty much all the settings that I had originally used, so I just started from scratch again, and I was using the default 185C PLA temperature. I tried increasing it to 190C and then 195C, and got dramatically better prints. You can see in this picture the difference it made: the left is with the original temperature (185C) and the new filament (pink), and the right print is the same exact model but with a 195C extrusion temperature.
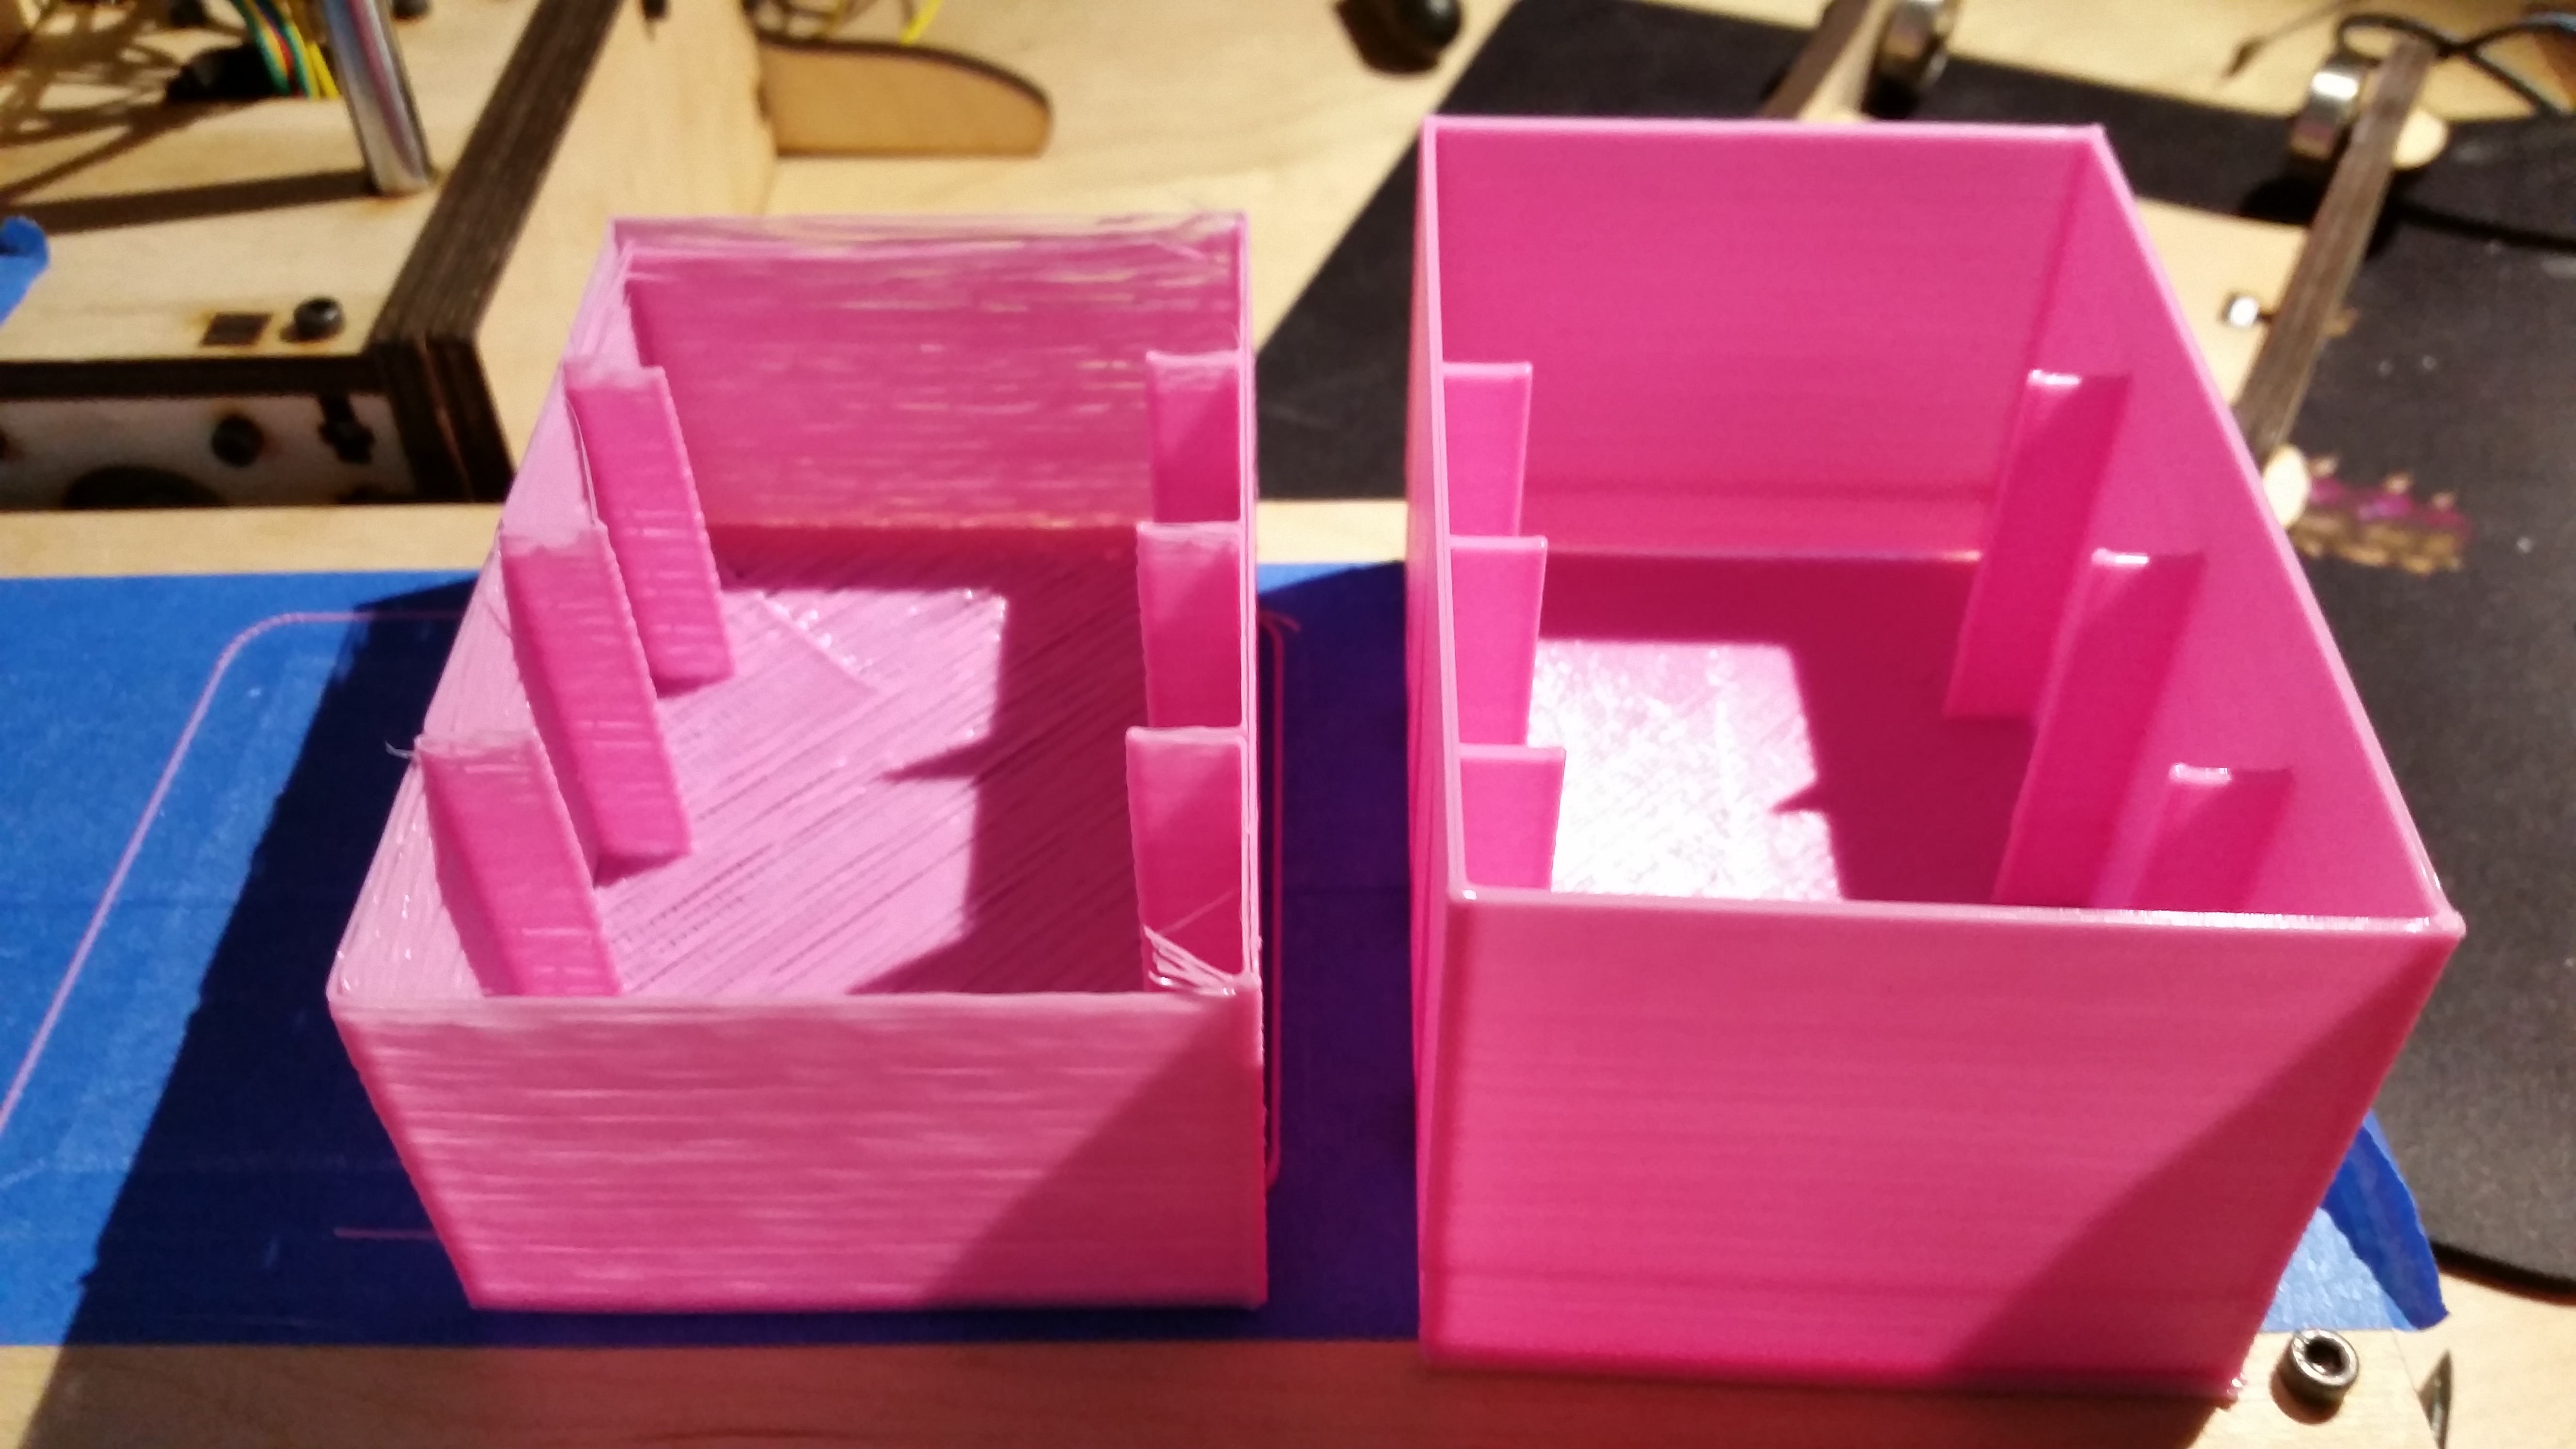
The print quality at the higher temperature is, quite simply, amazing. There is far better adhesion between the layers, better structural strength, better layer consistency, you name it. There’s only one tiny defect on the second print, and that’s due to having to swap out the filament in the middle of the print (you can see it about 20% through the print). The right model is also taller since the print for the one on the left failed towards the end, and didn’t complete the full model.
Not everything is perfect though; if you look closely at the top two prints in the following picture you can see that they’re both slightly slanted. Interestingly, they’re slanted in different directions! (you’ll have to trust me that those are the orientations in which they were printed.) The top-right print is a slightly different model which I assume explains the different slant angle. It surprises me though how much the slant angle can remain consistent throughout the height of the object — I would have thought any slippage would be random. (The deterministic nature of it originally led me to hunt down potential software bugs for a few days when I first got the printer, which is one reason it took so long to go back to investigating the fishing-line belt as the culprit).
Fortunately, these parts boxes are pretty forgiving of slant, especially in the X direction (the Y direction would have been harder since the envelopes would eventually start not fitting), so these two boxes are still entirely usable.
My new modeler: OpenSCAD
Previously, I had used Blender for creating my 3D models. Blender is a tool mostly designed for artistic 3D modeling, though it’s still a very capable 3D modeler. Consider the problem: I know the inner dimensions of the box that I’d like, and I’d like to design a containing structure that respects the cavity dimensions. With Blender you can certainly do it, but it’s a lot of adjusting of coordinates, which is not what the UI is designed for. There are also issues stemming from the fact that Blender is a surface modeler, and not a solid modeler: for graphics you don’t need the notion of “this is a solid object with faces on all sides”, but for printing out 3D parts that’s critically important! The tools will try to figure all of that out for you, but I did have to spend a fair amount of time twiddling face normals in Blender any time I did a boolean operation.
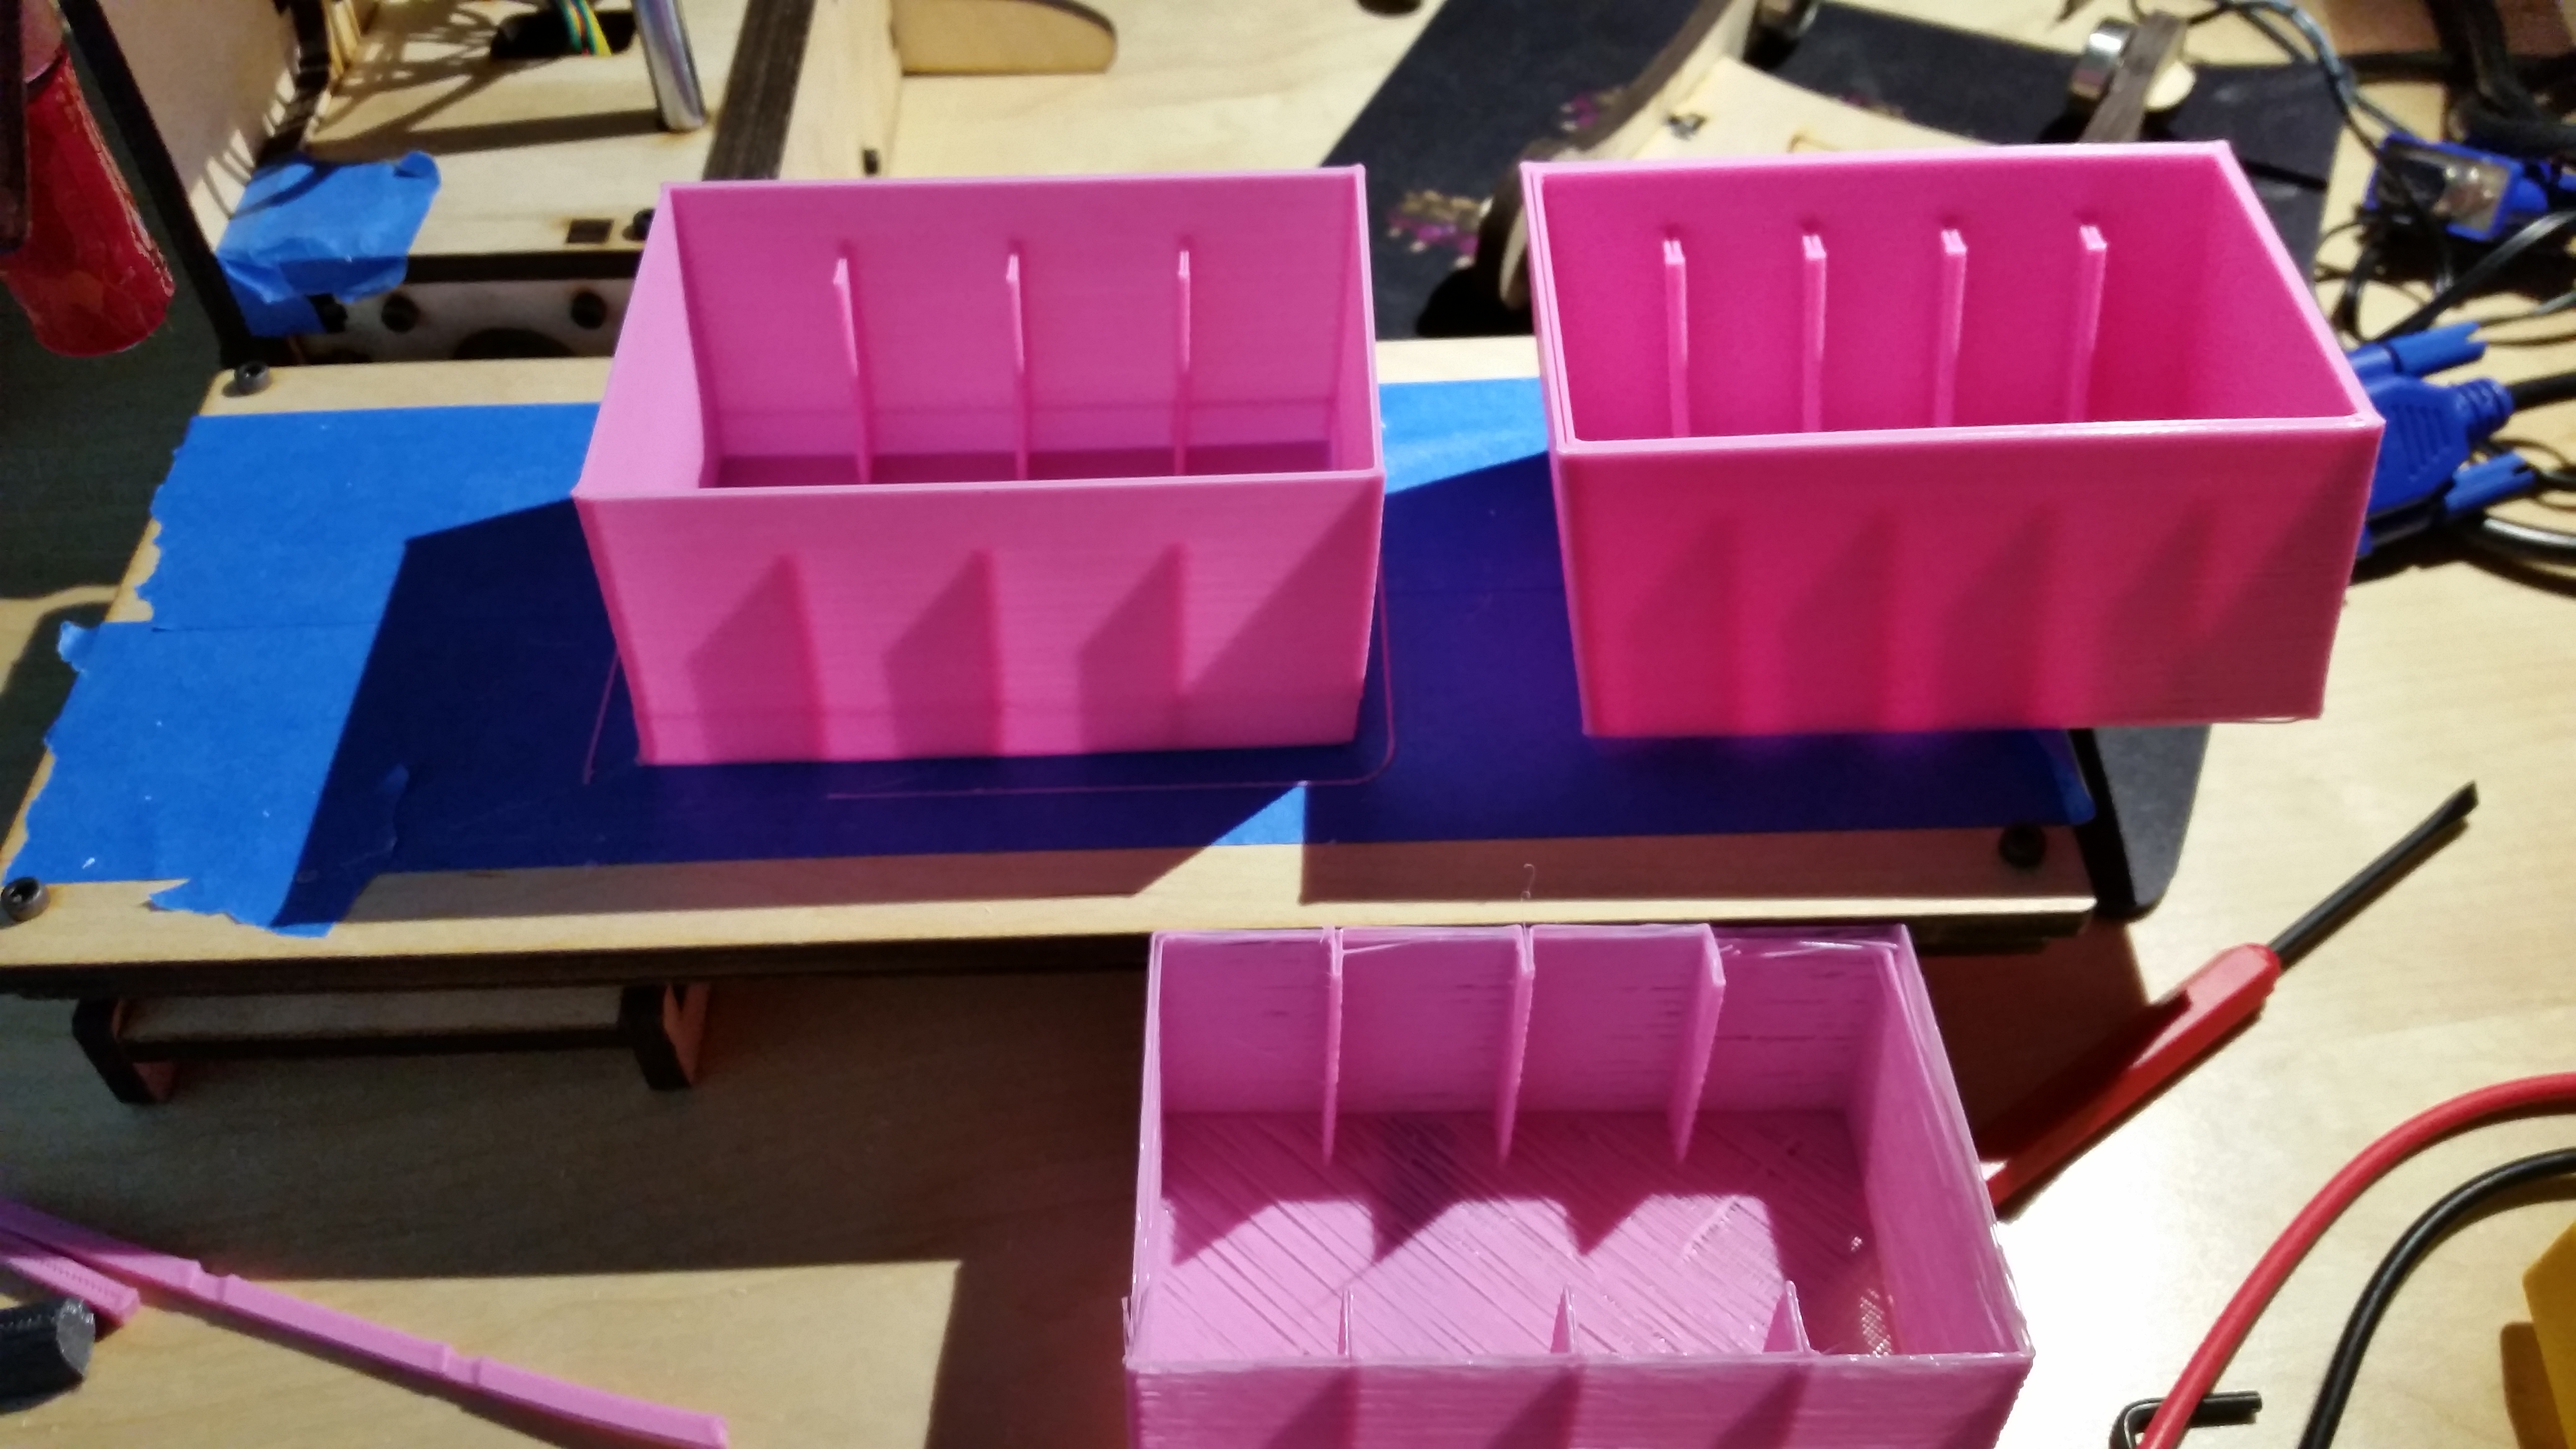
OpenSCAD, in contrast, is extremely well suited for this kind of problem. It’s all text-based; maybe I’m partial due to being a programmer, but it feels much easier to adjust the model when the coordinates are explicit like that. It also some limited programmability, so it was very easy to parameterize both the box thickness and the number of ridges: in the above picture, you can see that the second print is thicker and has 4 ridges instead of 3. OpenSCAD was also far simpler to get set up with; not that Blender is particularly hard, but it probably took me about 30 minutes to go from never having used OpenSCAD to installing it and having the model.
The downside is that the visualizations aren’t as good — go figure. I’m going to stick with OpenSCAD, but if I start doing more complicated models I’ll have to learn more about their visualization interface. Also I’ll want to figure out how to integrate it with an external editor (vim) instead of using their builtin one.
Future work
There are still a number of things that need to be fixed about this setup. First is the X-slant, clearly. Second is I need to figure out a good solution to the filament feeding problem. The “tower” upgrade comes with a spool holder on top of the printer which seems perfect, but I actually found it to be highly non-ideal: the printrbot is extremely susceptible to any Z forces on the extruder, since it is cantilevered out a fair amount. With the filament spool above the extruder head, there would be a varying amount of force pulling the extruder up towards the spool, resulting in the print head bobbing up and down as the spool wound or not. One would hope that the spool holder would result in low enough friction that the force on the extruder head would be minimal, but in practice it was a deal-breaker.
So I’ve gone back to putting the spool adjacent to the printer, using my 3D printed spool holder (the only other useful thing I’ve ever printed). I did buy the Printrbot discrete spool holder, but it varies between ok and terrible, depending on the spool that you try to use it with. They have a new hanging spool holder which seems promising; I may either buy it or try to design a similar one of my own.
I need to figure out what the deal is with the white filament: will the new temperature produce the same changes for that one as well? Or maybe I need to tinker with the extruder setup some more (too much idler pressure? not enough idler pressure?). Should I figure out some other way of storing all my filament?
I also want to upgrade my toolchain: a lot of things have moved on in the past year. Slic3r is now on a much newer version that hopefully fixes a number of the crashes I run into; PrintRun (prontrface) is apparently not the preferred print manager anymore, and I bet there are a number of improvements to the Marlin firmware for the printer itself.
3D printing feels much more like carpentry than printing. The tools are getting much more developed and the general body of know-how continues to build, but you still have to invest a lot of time and energy into getting the results you want. I wanted to say that it’s disappointing that things are still there after a year, but then again I’m still using the same printer from a year ago so it’s not clear what could have changed 😛 Printrbot has a new metal printer that seems like it could be much better, so maybe with a better printer certain aspects such as the cabling and the slantedness will be fixed. But there will still be the craft-like aspects of knowing what temperature to run your extruder at, your slicer settings, and so forth.
I’m going to give the X axis another go, and if I can get it printing straight then I think I’ll be extremely pleased with where the print quality has ended up. I still have to find things that I want to print though; I think there could be a lot more cool opportunities around parts organization.

One response to “Breaking out the 3D printer again”
Take a look at FreeCAD (http://freecadweb.org/) for FLOSS software that’s a little bit best of both worlds of programatic + parametric + visual design.
LikeLike